How To Draw Cell
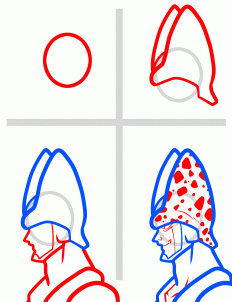
STEP 1. Again, we will start this tutorial by tackling a
step that will have you drawing Cell's side profile in
no time at all. Begin with a circle for the head and
then draw the helmet or head of his genetic make-up.
His head is cone shaped, so be sure to draw out these
mounds. You will then draw the side view of the face
as well as the sharp lining for the jaw and chin. Sketch
out the thick neck, then draw the shoulders and some
of the chest. Lastly, color in some spots that are oddly
shaped. Sketch in the eye, nose and mouth, then add
the definition detail on the chest like so.
 |
| Step 1 |
STEP 2. Now lets draw the front view of Cell. Start by
making an oval or egg shape. Sketch in the facial
guides, then you are ready to proceed to step three.
 |
| Step 2 |
STEP 3. Here you will draw the high pitched cone
shapes for the helmet, then draw the top of the head
. Make the lining to form out the half part of the face
that is covered by the helmet.
 |
| Step 3 |
STEP 4. You will now detail Cell's helmet then sketch
in the wrinkling on the brow like so. Sketch out the
structure of Cell's face and be sure to add all
appropriate definitions.
 |
| Step 4 |
STEP 5. You will now sketch in all the detailing
around the face which is the lining that frames the
face. Draw the eyes, then make the cyan lines down
the face. You will also need to sketch in the small
nose and his devilish grin.
 |
| Step 5 |
. You will sketch out the wide shape of his muscular
neck, then add all the detailing that follows. Draw the
angled lines that makes up the shoulders and the
padding which is also part of Cell's design. The chest
should be bulky and bulge out. Erase the mistakes
when your done
 |
| Step 6 |
done. Color him in to really finish the devilish Cell off
. Now you have another character from Dragon Ball Z
to add to your drawing collection.
 |
| Step 7 |
For Mores Tutorial Join Our Site
http://www.dragoart.com/

Aucun commentaire:
Enregistrer un commentaire